Before You Start
I highly recommend doing your research before getting started. This page documents the process I followed, which might not be 100% what you’d want to be doing.
A helpful guide from the UNH Extension can be found here [pdf]. This page is also useful https://practicalmechanic.com/2019/04/08/making-maple-syrup-how-to-perfect-the-finishing-boil/
Warning: Producing maple syrup requires you to boil the sap for a long time. Boiling sap is hot and can potentially burn you. Additionally, propane gas burners produce flames and use flammable gasses. Use caution!
Materials
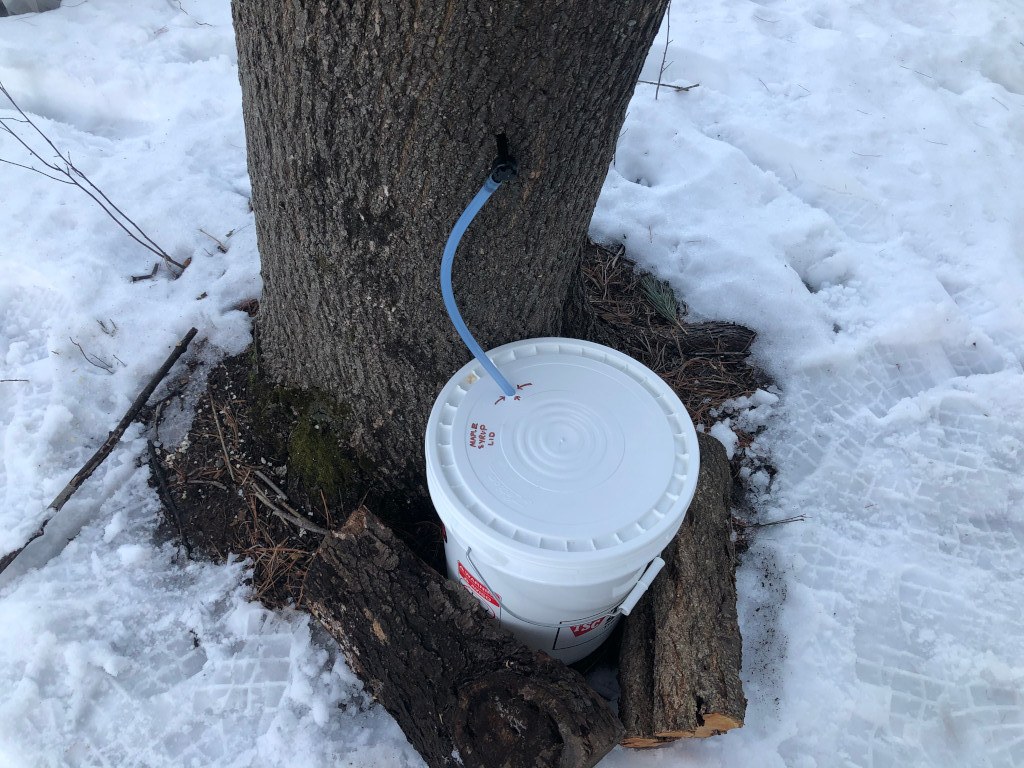
- Maple Syrup Tap & Drop Line or similar.
- 5 Gallon Pail + Lid (food grade). I got mine at Tractor Supply. It’s helpful to get two or more, so you can swap them out.
- Outdoor gas burner (like a turkey cooker) for outdoor boiling
- Large pot for boiling outdoors
- Stovetop for finishing the batch
- Candy thermometer
- (2023) - I purchased a cheap refractometer for measuring sugar content https://www.amazon.com/dp/B01LWAFVVN. I calibrated it against actual maple syrup, which has approximately the 66% sugar content. This year, I’ll try and use this for finishing my boil and report back.
Setup
- Drill hole in lid of bucket for drop line (depends on diameter of line). Some people drill into the side of the bucket, which might be better for getting less debris in the bucket.
- Drill 5/16 (or your tap size) hole into tree about 2.5 feet from the ground, about 1.5” in depth and at a slight 10° upward angle going into the tree.
- Attach drop line to tap (protip: heat tube with hot water to make it easier to attach)
- Insert tap and lightly tap in so it’s secure but not jammed in the hole
- Insert the drop line into the bucket
- Wait until you have at least ~5 gallons and begin the boiling process.
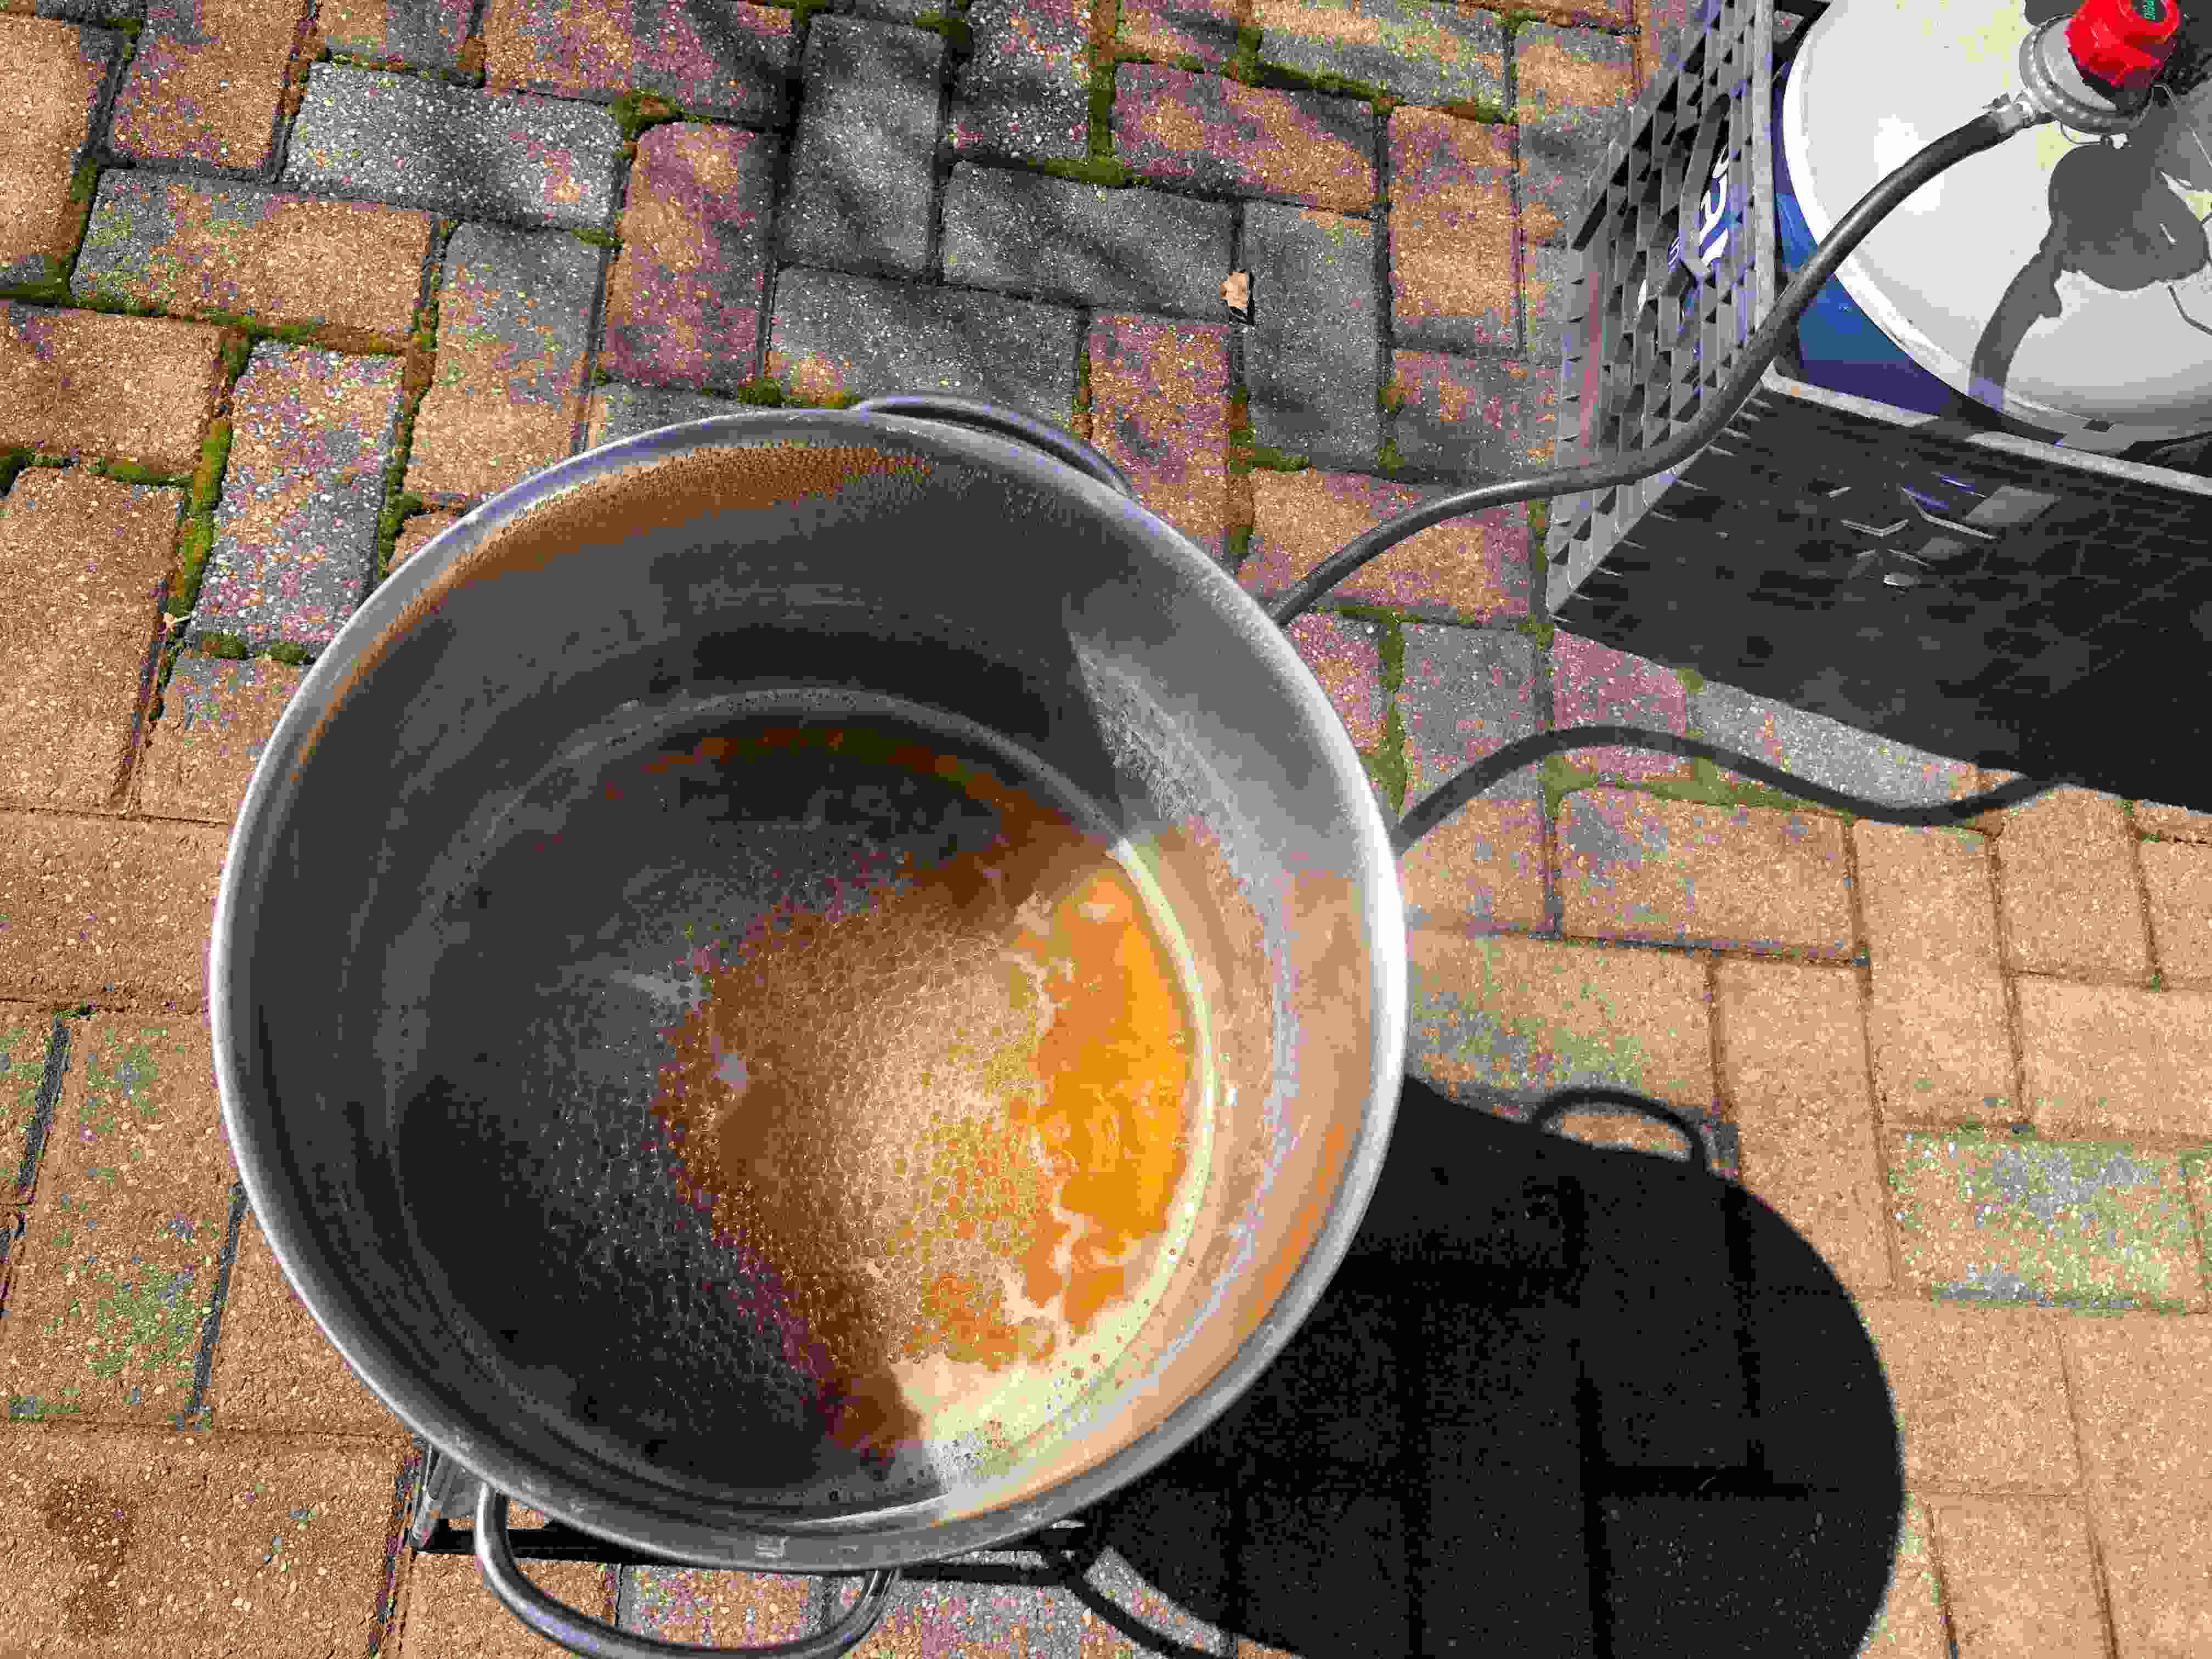
Boiling
Once you have about a enough sap collected, you can begin the boiling process. This process can take a long time, so don’t make the mistakes I did and start too late in the day - you’ll be sorry when it’s midnight and you’re still finishing the syrup.
The principle is simple: Fill a large pot with sap, and boil down until it starts to turn brown. I used a large pot and filled it about 3/4 of the way with sap, and let it boil down. As it approached around 1/2 of the way, I added some more. Once the sap turns slightly brown and is in a small enough quantity, we can bring it inside to boil on a stove for the final boil.
When the sap reaches about 219°F let it continue for a minute or two and it should be about done. To measure the temperature, you can use a candy thermometer for cooking.
A slightly more in-depth guide I found really helpful can be found here
Note from the future: I probably could’ve boiled mine a little bit more. Bubbles should be sticky.
Filtering
We want to filter the sap about 4 times:
- Before adding the sap to the initial pot
- When transferring from large pot to small finishing pot
- When the syrup reaches about 215°F
- After boiling is complete.
For the initial filter I used one that came with my kit, but I think most cloth cooking filters should work. For the final two, I used two stacked coffee filters lining a kitchen strainer. For the final filtering, I used a single coffee filter. You’ll notice as it gets boiled down it takes longer to filter each time.
I need to research better filtering methods - I purchased some different synthetic filters in 2021 but a bunch of niter still made it through to the final product. The coffee filters work the best so far, although they’re small and slow.
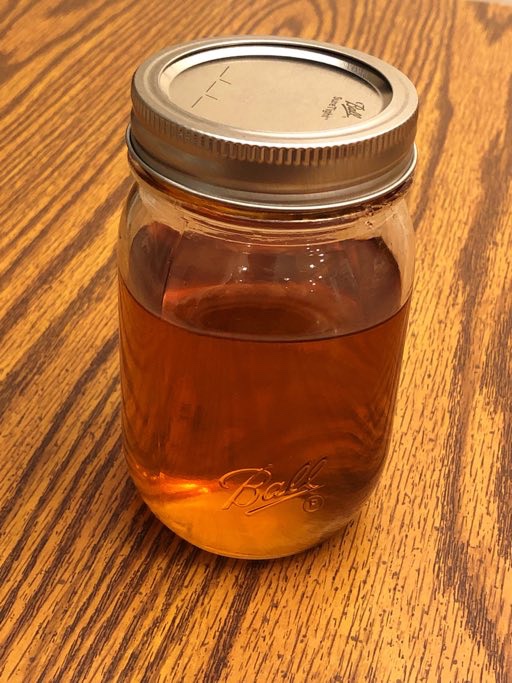
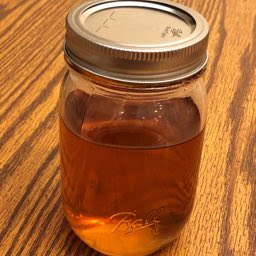
How much syrup is produced?
I boiled down about 4.5 gallons of sap to produce about one pint. The general ratio is about 40:1 sap to syrup, but seems like it varies a little depending on where you get your information.
How long does it take
My heating solution was less than ideal - it took about six hours to completely boil down the sap, and a little longer for finishing + putting it in a jar.
Precautions
Sometimes the sap can become cloudy or discolored and spoil if it’s left out for too long in too warm an environment. Some online wisdom says “treat it like milk”. Also, when in doubt - throw it out!
Empty buckets frequently to prevent bacteria growth. Refrigerating & freezing the sap can preserve it until it’s boiled.
When finishing the boil, be careful - if you upset it near when it’s done (like stirring it with a cold spoon), it may rapidly boil over and spread syrup everywhere. Would not recommend!
Results